
The Tool & Die Lifecycle: From Initial Design to Long-Term Maintenance
Tool and die manufacturing represents a significant investment for any production operation. Understanding the complete lifecycle of tooling helps manufacturers make better decisions about design, fabrication, maintenance, and eventual replacement. From concept through decades of productive use, each phase of the tooling lifecycle requires careful attention to maximize return on investment.
Phase 1: Concept and Design
Every tool or die begins with a clear understanding of what needs to be manufactured. This initial phase involves collaboration among product designers, manufacturing engineers, and toolmakers to define requirements and constraints.
The design process considers part geometry, production volume, material being formed, required tolerances, and expected tool life. A die for 10,000 parts requires different considerations than one for a million-piece run.
Computer-aided design (CAD) has revolutionized tool design. Engineers can model complex geometries, simulate material flow, and identify problems before any metal is cut. Experienced tool makers provide valuable input, suggesting modifications that improve performance or reduce costs.
Material selection happens during design. Tool steels come in many grades with different properties. For high-volume stamping, carbide inserts or specialized coatings might be specified for critical wear surfaces.
Phase 2: Fabrication and Manufacturing
Once the design is finalized, fabrication begins. Tool and die making combines traditional craftsmanship with modern CNC machining. The process starts with cutting and rough machining of tool steel blocks.
Heat treatment is critical for tool performance and longevity. Tool steels must be heated to precise temperatures and cooled in controlled ways to achieve the desired hardness and toughness. Improper heat treatment results in tools that wear quickly or crack under stress.
After heat treatment, precision machining produces the final dimensions. Surface grinding, CNC milling, and wire EDM each play roles in creating accurate tooling. For stamping dies, components must be precisely aligned and fitted.
Injection molds involve additional complexity with cooling channels, gate locations, and polishing operations that create the surface finishes replicated on molded parts.
Phase 3: Tryout and Refinement
The first time a new tool runs is called a tryout. This critical phase reveals how well design and fabrication came together. Sample parts are inspected for dimensional accuracy, surface finish, and defects.
Adjustments are normal during tryout. A forming die might need relief where material stretches excessively. A blanking die's clearances might need refinement for optimal edge quality.
Injection mold tryout evaluates fill patterns, cycle times, and part quality. Adjustments to gate size or cooling line flow rates optimize performance. Documentation of tryout results and modifications is essential for future maintenance.
Phase 4: Production Life
With the tryout complete, the tool enters its productive phase. Proper care during production extends tool life and maintains part quality. This includes correct setup, appropriate lubrication, regular cleaning, and monitoring for wear.
Operators should inspect parts periodically and watch for signs of tool wear. Early detection allows for preventive maintenance before quality suffers. Production volume tracking helps predict maintenance needs based on cycle counts and hit ratings.
Phase 5: Preventive Maintenance
Regular maintenance is the most cost-effective way to extend tool life. Preventive maintenance schedules should be based on production volume, material processed, and historical wear patterns.
For stamping dies, maintenance includes sharpening cutting edges, replacing wear plates, and checking alignment. Injection molds require cleaning to remove resin buildup, inspection of worn areas, and flushing of the cooling system.
Documentation of maintenance activities creates a service history that helps predict future needs and troubleshoot problems.
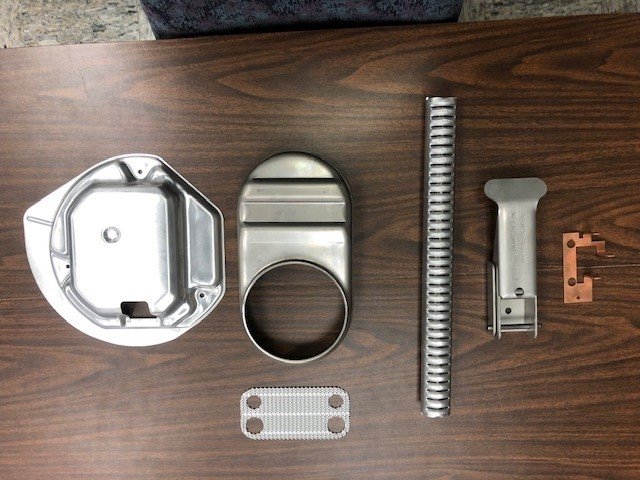
Phase 6: Corrective Repairs
Despite preventive maintenance, unexpected failures happen. A skilled tool room can assess damage, determine root causes, and implement effective repairs quickly to minimize downtime.
Common repairs include welding worn surfaces and remachining, replacing broken components, and repairing damaged mechanisms. Root cause analysis during repairs prevents recurrence by identifying whether failures stem from design flaws, improper clearances, or other issues.
Phase 7: Refurbishment and Upgrades
As production requirements change or wear accumulates, major refurbishment may be justified. Refurbishment restores tooling to like-new condition or improves performance beyond original specifications.
For stamping dies, refurbishment might include replacing entire sections, upgrading to wear-resistant materials, or modifying geometry. Injection molds can be refurbished by re-cutting cavities, upgrading cooling systems, or adding cavities to increase capacity.
The economics depend on the remaining tool life and cost compared to new tooling. Well-executed refurbishment can deliver years of additional service at a fraction of the cost of a new tool.
Phase 8: End of Life
Eventually, all tools reach the end of productive life due to accumulated wear, obsolete part designs, or damage too extensive to repair cost-effectively.
Proper documentation at the end of life captures lessons learned for future tool designs. Some retired tools have salvage value through recycling or reusable components.
Maximizing Tool Life and ROI
Understanding the complete tool and die lifecycle enables better decision-making at each phase. Investing in quality design and fabrication pays dividends throughout the tool's life. Implementing disciplined maintenance programs prevents premature failure. Documenting everything creates the knowledge base that drives continuous improvement.
The relationship with your tool and die maker shouldn't end when the tool ships. The best partnerships include ongoing support through tryout, production problem-solving, maintenance planning, and eventual refurbishment.
Partner with Tool & Die Lifecycle Experts
At Barton Tool, we support customers through every phase of the tool-and-die lifecycle. From collaborative design and precision manufacturing to maintenance support and refurbishment services, our 50+ years of experience ensure your tooling delivers maximum value over its entire productive life.
Ready to discuss your tool-and-die needs? Contact our team today to learn how we can help optimize your tooling lifecycle.